Cisco AnyConnect Mobility Client (VPN)
If you need to access resources that are only available on the UNT Network, you'll need to use Cisco VPN. To enable VPN, you may need to install a VPN client.
UNT VPN connections will last a maximum of 24 hours before they will need to be reconnected (this is for security purposes).
If you have any questions please contact us or SUBMIT A TICKET
INSTALLING ANYCONNECT
All College of Music computers should have AnyConnect installed by default.
Other Computers
This includes Personal Apple Computers and Personal Windows Computers.
Connecting to the campus VPN is done in two simple steps:
- Login to the Campus VPN web portal
- Use your EUID to login.
- Use your EUID Password.
- Start AnyConnect
- Download and Install AnyConnect, if needed
RUNNING ANYCONNECT
Once you have AnyConnect installed on your computer, you can run Cisco AnyConnect from the Start Menu. The VPN address should be pre-populated as vpn.unt.edu (or vpn#.unt.edu -- where # is a number). If you are faculty or staff, leave the group as General and Authenticate with your EUID credentials.
If you need assistance starting AnyConnect, ITSS has provided a document with details. As always, you can contact us for assistance or SUBMIT A TICKET
Windows
- Click your Start Menu icon (or press the Windows Key)
- Type: Anyconnect
- Click to Run Cisco AnyConnect (or Press Enter if it's highlighted)
- Use vpn.unt.edu as the server address
- Click Connect, then login with EUID and UNT password
- Read and accept the usage terms.
Linux (Ubuntu, etc.)
- Start Cisco AnyConnect from Applications
- Type in "vpn.unt.edu"
- Click Connect, then login with your UNT credentials
- Read and accept the usage terms.
APPLE MacOS
VPN on macOS with Cisco AnyConnect
- Start Cisco AnyConnect from Applications
- Type in "vpn.unt.edu"
- Click Connect, then login with your UNT credentials
- Read and accept the usage terms.
VPN on macOS with Builtin VPN Client
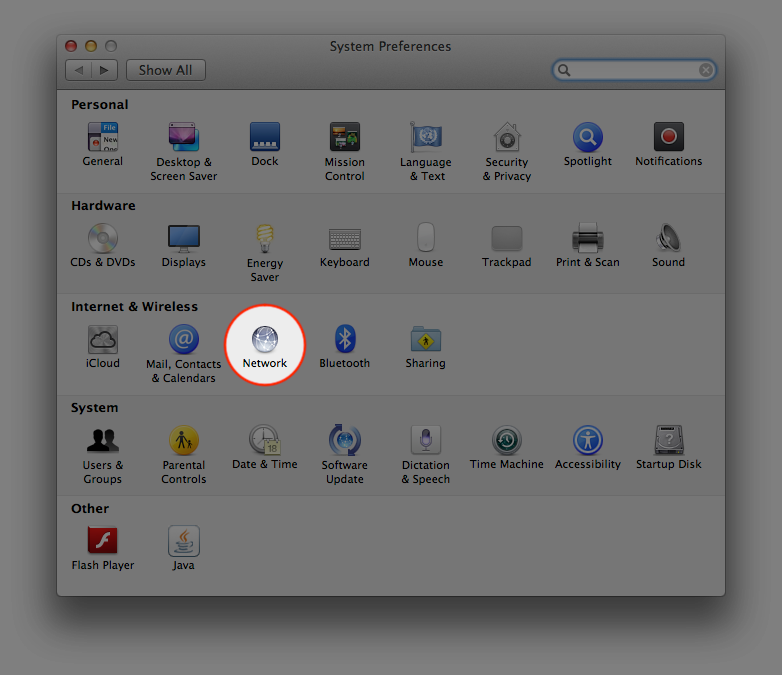
- Open Network from System Preferences
- Click on the plus (+) symbol in the bottom left to add a service.
Note: In order to do this, you must have administrator credentials.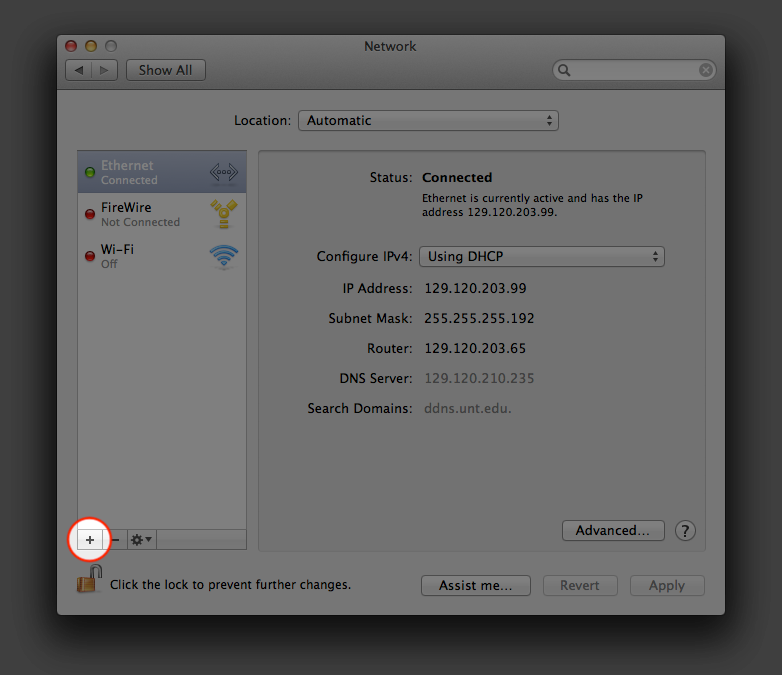
- In the Service Creation window:
Interface: VPN
VPN Type: Cisco IPSec
Service Name: UNT VPN
Click Create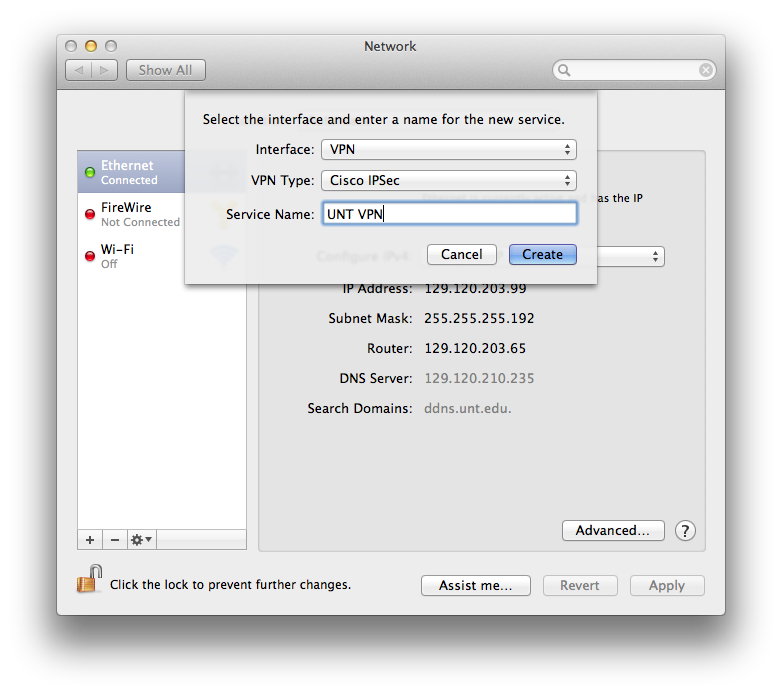
- In the Service Configuration window:
Server Address: vpn.unt.edu
Account Name: EUID
Password: EUID Password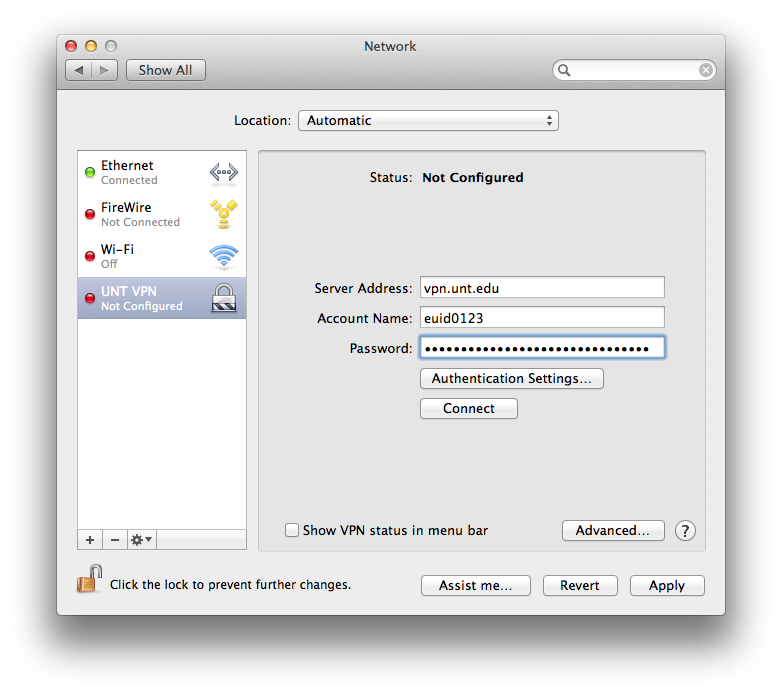
- Click Authentication Settings. In the Authentication Settings windows:
Shared Secret (case sensitive): untvpnaccess
Group Name (case sensitive): General
Click OK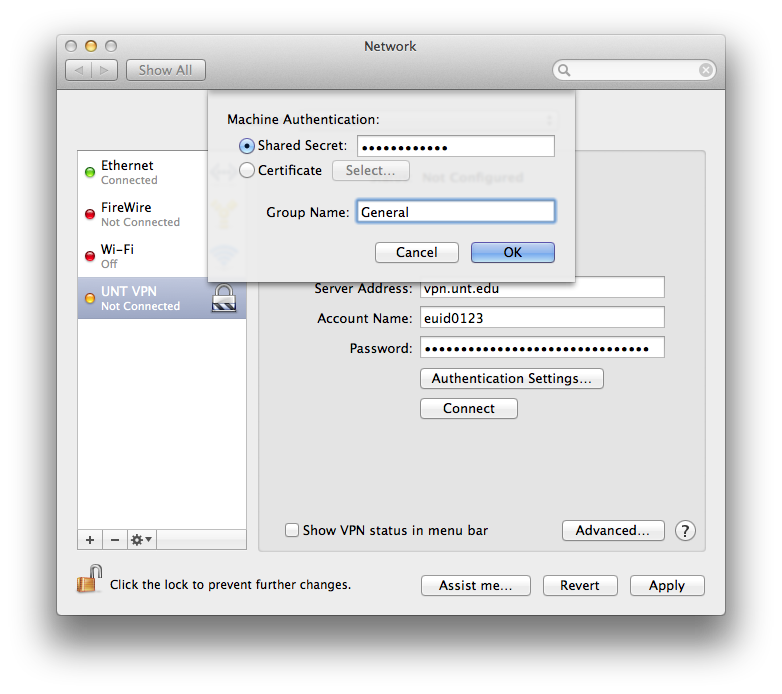
- Click Connect.
Note: You may get prompted for authentication to the VPN connection.
6a)
Account Name: EUID
Password: EUID Password
Click OK.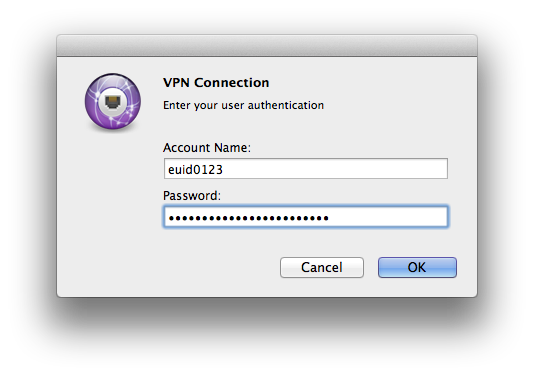
6b)
Read UNT Terms of Service.
Click OK if you understand and agree to the Terms of Service.
Click Disconnect if you don't understand of disagree with the Terms of Service.
Note: you may contact us with any questions or concerns or SUBMIT A TICKET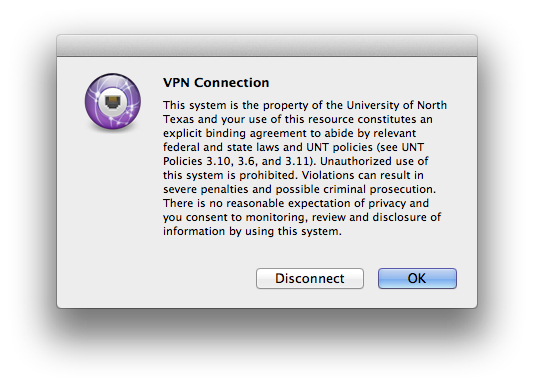
The Apple computer you're working on is now configured to connect to the UNT VPN.
Credit: These excellent instructions used with permission from Computing for Arts + Sciences' VPN page here